Mastering Grunge Background Brushes for Authentic Digital Texture
In the world of digital design, achieving a look that feels organic and lived-in is often more challenging than creating something sleek and modern. This is where Grunge Background Brushes become an indispensable tool in your creative arsenal. Whether you are designing album covers, vintage posters, social media graphics, or textured overlays for photography, these brushes allow you to introduce imperfection, age, and character into your work with precision. However, simply downloading a set of brushes does not guarantee professional results. Many creators overlook the nuances of how these tools function within software like Photoshop and Procreate, leading to flat, repetitive, or unnatural outcomes.
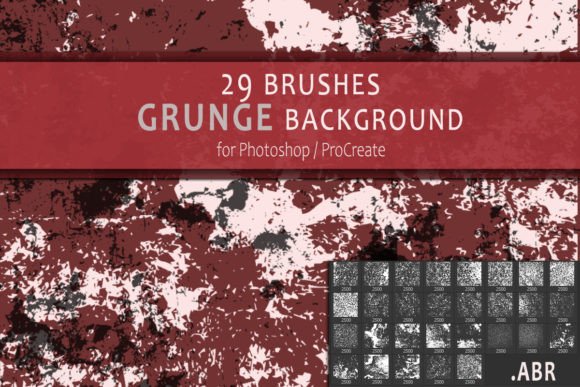
The collection we are discussing includes 29 textured grunge brushes specifically formatted in .ABR files, compatible with both Adobe Photoshop and Procreate. With a resolution size of 2500 pixels, they offer sufficient detail for high-quality projects without bloating your file sizes unnecessarily. Yet, even with high-quality assets, the difference between an amateur overlay and a sophisticated design lies in understanding common pitfalls and applying corrective techniques.
Avoiding the Trap of Over-Application
One of the most frequent mistakes beginners make when using grunge textures is over-application. It is tempting to slap a heavy texture over an entire canvas to instantly "age" it, but this often results in a muddy image where the original subject matter is lost. When you apply a grunge brush at full opacity across a large area, you risk destroying the legibility of text and the clarity of focal points.
Better Approach: Instead of covering everything, use these brushes strategically. Apply them to specific areas where wear and tear would naturally occur, such as corners, edges, or behind text elements to create depth. Lower the opacity of the brush layer to between 20% and 40%. This allows the texture to interact with the underlying colors rather than obscuring them. Think of the texture as a subtle seasoning, not the main course.
Understanding Resolution and Scalability
Another critical aspect often ignored is the relationship between brush size and canvas resolution. The brushes in this pack are sized at 2500 pixels. While this is versatile for many web and print projects, users sometimes stretch these brushes beyond their optimal range, causing pixelation or loss of detail. Conversely, using them on a massive billboard-sized canvas without adjusting settings can make the texture appear too fine and insignificant.
Practical Advice: Always check your document’s DPI (dots per inch) before starting. For web graphics, 72 DPI is standard, but for print, you need 300 DPI. If you are working on a high-resolution print project, ensure you are not scaling the brush up excessively. If the texture looks blurry, it is better to stamp the brush multiple times in a pattern rather than stretching a single instance. This maintains the crispness of the grunge details.
Misunderstanding Layer Blending Modes
Many users place a grunge texture on a new layer and leave the blending mode set to "Normal." This is a missed opportunity. The magic of Grunge Background Brushes happens when you experiment with blending modes. Leaving it on Normal often makes the texture look like a sticker placed on top of your art, rather than an integrated part of the design.
- Multiply: Best for darkening areas and adding dirt or shadow effects.
- Screen: Ideal for light scratches, dust, or worn-out highlights.
- Overlay: Creates a high-contrast effect that integrates the texture deeply with the colors beneath.
- Soft Light: Offers a subtler integration, perfect for gentle aging.
By cycling through these modes, you will find that the same brush stroke can produce vastly different emotional tones. A mistake here leads to extra work later, as you might try to fix color issues with adjustment layers when the solution was simply changing the blend mode initially.
Ignoring the Value of Variety
This ZIP folder contains 29 distinct brushes. A common error is picking one favorite brush and using it exclusively throughout a project. This creates a repetitive pattern that the human eye quickly identifies as artificial. Real wear and tear is random and varied. Using the same stamp repeatedly breaks the illusion of authenticity.
Solution: Force yourself to rotate through the entire set. Combine rough, jagged edges with softer, dusty splatters. Mix large background washes with small, detailed scratches. The variety in this pack is designed to mimic the chaos of real-world decay. By layering different brushes from the set, you build complexity. For instance, use a broad, faded brush for the base atmosphere, then add smaller, sharper brushes for specific distress marks on typography or borders.
Installation and Compatibility Checks
Before you can avoid artistic mistakes, you must ensure technical success. Users often struggle with installation, particularly when moving between devices or software versions. The .ABR format is standard, but confusion arises when users try to import them incorrectly into Procreate or older versions of Photoshop.
To install these brushes efficiently:
- Download the ZIP folder and extract the contents to a known location on your device.
- For Photoshop, go to Edit > Presets > Preset Manager or simply double-click the .ABR file if your version supports it.
- For Procreate, import the .ABR file via the Brush Studio by selecting "Import."
Failing to extract the ZIP file first is a frequent hurdle. Trying to import the compressed folder directly will result in an error. Taking thirty seconds to unzip the file ensures a smooth workflow. Additionally, always back up your custom brush sets. If you update your software, custom brushes can sometimes be reset. Keeping a copy of this .ABR file in a cloud storage folder ensures you never lose access to your tools.
Evaluating Quality Before Commitment
When considering any digital asset, including Grunge Background Brushes, it is vital to evaluate its utility against your specific needs. Not every grunge pack is suitable for every project. Some are too aggressive for corporate branding, while others are too subtle for punk rock aesthetics. This particular set, with its 29 varied textures, offers a balanced middle ground suitable for decorators, marketers, and hobbyists alike.
Before purchasing or downloading similar tools in the future, check the resolution limits. A brush size of 2500 pixels is robust for most A4 prints and web banners. If you are doing large-format printing, verify if the creator offers higher resolution options. Also, consider the software compatibility. Since this set works for both Photoshop and Procreate, it is an excellent choice for artists who sketch on an iPad and finish on a desktop. This cross-platform flexibility saves time and money, preventing the need to buy separate packs for different devices.
If you have any questions about installation or usage, reaching out to the creator, Svetlana, is a proactive step. Good support indicates a reliable product. Engaging with the seller can also provide tips on how they personally use the brushes, offering insights that manuals often miss.
In conclusion, mastering these tools requires a shift from passive application to active design thinking. By avoiding over-use, respecting resolution limits, leveraging blending modes, and embracing variety, you transform simple digital stamps into powerful storytelling elements. These Grunge Background Brushes are not just shortcuts; they are foundational elements for creating work that feels tangible, historical, and emotionally resonant. Take the time to experiment, make mistakes in your drafts, and refine your technique. The result will be designs that stand out in a saturated digital landscape.